How to Replace the Drive Belt on a Wood Lathe
Wood lathes are among the most rewarding tools in any woodworker’s shop, yet a worn or broken drive belt can shut down your entire workflow in minutes. According to industry surveys, belt-related issues account for nearly 30% of all lathe maintenance calls, and most woodworkers face this repair at least once every two to three years. Knowing how to replace the drive belt on a wood lathe saves you money, reduces downtime, and keeps your projects on schedule. This guide walks you through every step of the process, from identifying the right belt to reassembling your machine with confidence. Whether you own a bench-top lathe or a full-sized floor model, the process is straightforward when you follow the right approach.
Why a Healthy Drive Belt Matters for Your Lathe
The drive belt transfers power from the motor to the spindle, so its condition directly affects cutting performance. A stretched or cracked belt causes slipping, uneven speed, and vibration that can ruin a finished piece. Many woodworkers ignore early warning signs because the lathe still technically runs. However, catching a failing belt early prevents motor strain and bearing damage down the road. Replacing the belt promptly is one of the simplest and most cost-effective forms of lathe maintenance you can perform.
Common Signs Your Drive Belt Needs Replacement
Recognizing the symptoms early saves you from bigger repairs later. Watch for these clear indicators that your belt is due for a change:
- Squealing or chirping sounds when the lathe starts or runs at high speed
- Slipping under load where the spindle slows noticeably when you press a tool against the workpiece
- Visible cracking, fraying, or glazing on the belt surface
- Excessive vibration that worsens as speed increases
- Burning rubber smell during operation, which signals heat from constant slipping
If you notice two or more of these signs together, stop using the lathe immediately and prepare for a belt replacement.
Tools and Materials You Will Need
Gathering everything before you start makes the job faster and safer. Most of these items are already in a well-stocked shop or available at any hardware store.
- Replacement drive belt (matched to your lathe’s specifications)
- Owner’s manual or model number for belt size reference
- Set of hex keys or Allen wrenches
- Standard screwdrivers (flathead and Phillips)
- Adjustable wrench or socket set
- Clean rag or shop towel
- Flashlight or work light for better visibility
- Marker or tape for labeling belt routing if needed
Always buy an OEM-spec belt or a reputable aftermarket equivalent rated for your lathe’s horsepower and pulley diameter. Using an undersized or oversized belt creates slipping and premature wear.
How to Replace the Drive Belt on a Wood Lathe: Step-by-Step
Following a clear, ordered process keeps you safe and ensures the belt seats correctly the first time. Read through all steps before you begin so there are no surprises midway.
Step 1: Disconnect Power and Prepare the Machine
Safety comes first in every lathe maintenance task. Unplug the lathe from the wall outlet and verify the power is completely off before touching any internal components. If your lathe uses a switch with a key, remove the key and keep it in your pocket. Allow the motor to cool for at least ten minutes if you ran the machine recently. A cool motor is safer to handle and easier to work around.
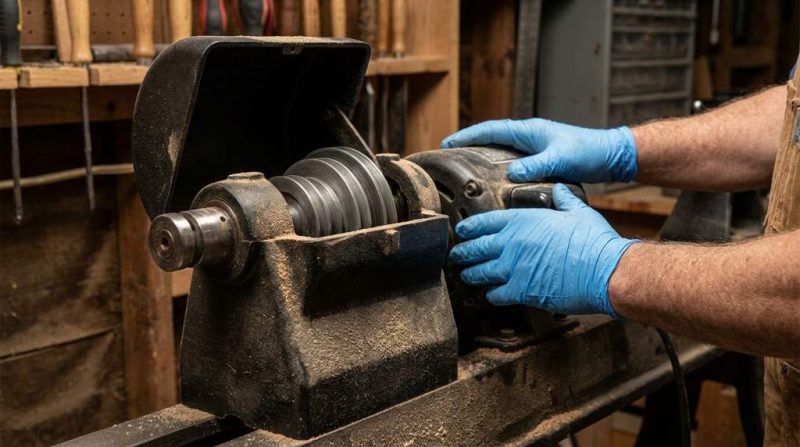
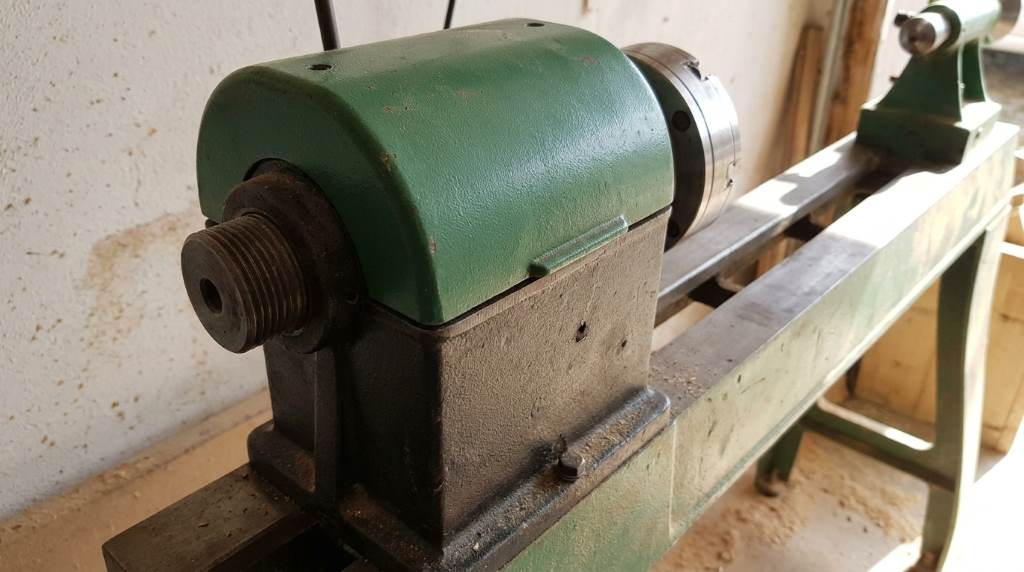
Step 2: Access the Belt Housing
Most lathes house the drive belt behind a removable cover or guard panel on the left side of the headstock. Locate the belt access cover and remove the screws or bolts holding it in place. Set the screws in a small cup or magnetic tray so you do not lose them. Slide the cover off carefully and set it aside in a clean spot. Take a quick photo of the belt routing with your phone before removing anything, as this reference saves significant time during reassembly.
Step 3: Release Belt Tension
Belt tension on a wood lathe is controlled in one of two ways: a motor-pivot system or a tensioner pulley. For a motor-pivot system, loosen the motor mounting bolts just enough to slide the motor toward the spindle pulley. For a tensioner pulley, locate the adjustment bolt and back it off until the belt goes slack. Never cut the old belt to remove it, as this can damage pulley edges. Work the old belt off the pulleys by hand with gentle side-to-side wiggling.
Step 4: Inspect the Pulleys
Before installing the new belt, take a moment to inspect both the motor pulley and the spindle pulley. Look for worn grooves, sharp edges, rust buildup, or accumulated sawdust and resin. Wipe the pulleys clean with a dry rag and remove any debris from the grooves. A damaged or dirty pulley will chew through a new belt quickly. If you notice significant groove wear, address it now rather than after installing a fresh belt.
Step 5: Install the New Drive Belt
Loop the new belt over the spindle pulley first, then guide it onto the motor pulley. Keep the belt seated evenly in the center of each groove without any twisting. For step-pulley lathes, place the belt on the pulley pair that matches your desired speed range. On variable-speed lathes, route the belt exactly as shown in your reference photo from Step 2. Take your time here because a misrouted belt causes noise, vibration, and early failure.
Step 6: Set Proper Belt Tension
Correct tension is one of the most important parts of learning how to replace the drive belt on a wood lathe. Too much tension strains bearings and the motor shaft; too little causes slipping under load. As a general guideline, a properly tensioned belt deflects approximately half an inch when you press it firmly at the midpoint between the two pulleys. On a motor-pivot system, slide the motor away from the spindle pulley until you reach that deflection, then tighten the mounting bolts evenly. On a tensioner system, tighten the adjustment bolt until the correct deflection is achieved.
Step 7: Replace the Cover and Test the Machine
Slide the belt access cover back into position and reinstall all screws finger-tight before final tightening. Avoid overtightening plastic covers, as this can crack the housing. Once the cover is secure, plug the lathe back in and run it at the lowest speed setting for about 30 seconds without a workpiece. Listen for smooth, quiet operation and watch for any unusual vibration. Gradually step up through the speed settings to confirm the belt runs evenly across the entire RPM range.
Choosing the Right Replacement Belt
Selecting the correct belt type is just as critical as the installation itself. Most wood lathes use one of three common belt types: V-belts, flat belts, or poly-V (serpentine) belts. Check your owner’s manual for the exact cross-section size, outside circumference, and material rating. For lathes with variable-speed drives, a link-type belt or segmented belt allows fine-tuning without cutting. Always match the replacement to your original belt’s profile to maintain proper pulley engagement and power transfer.
Belt Material Comparison
| Belt Type | Best For | Average Lifespan |
|---|---|---|
| Standard V-belt | Single-speed bench lathes | 2 to 4 years |
| Cogged V-belt | High-torque floor lathes | 3 to 5 years |
| Poly-V (serpentine) | Variable-speed lathes | 4 to 6 years |
| Link belt | Vibration-sensitive setups | 5+ years with care |
How to Extend Your Drive Belt’s Lifespan
Regular maintenance dramatically extends the time between belt replacements. Keep the belt housing clean and free of sawdust, since fine debris acts as an abrasive against the belt surface. Check belt tension every six months or after 50 hours of use, whichever comes first. Avoid starting the lathe under heavy load, as cold starts at full resistance spike stress on the belt. Store spare belts flat in a cool, dry location away from direct sunlight, because UV exposure degrades rubber compounds faster than normal use.
Safety Tips to Follow Every Time
Safety should be part of every maintenance session, not an afterthought. Always disconnect power at the outlet, not just at the machine’s switch, because switch failures are possible. Never reach into the belt housing while the lathe is plugged in, even to make a quick adjustment. Wear safety glasses when cleaning pulleys, as compressed air can send debris toward your face. Keep your work area clear of trip hazards so you can move freely around the machine. Following these simple practices protects both you and your equipment during every service visit.
Conclusion
Learning how to replace the drive belt on a wood lathe is a skill every serious woodworker should have in their toolkit. The process takes less than an hour once you are familiar with your machine, and it costs a fraction of a professional service call. By following the steps in this guide, you protect your motor, improve turning performance, and extend the life of your lathe significantly. Do not wait for a complete belt failure to take action. Check your belt today, order a quality replacement if needed, and keep your lathe running at its best for every project ahead.
Frequently Asked Questions
How often should I replace the drive belt on my wood lathe?
Replace the drive belt every two to four years, or sooner if you notice slipping, cracking, or unusual noise during operation.
Can I use any V-belt from a hardware store on my wood lathe?
Always use a belt that matches your lathe’s exact specifications because an incorrect size causes slipping, excessive wear, or pulley damage.
Is it safe to replace a lathe drive belt without a technician?
Yes, replacing a drive belt is a straightforward DIY task as long as you completely disconnect power before starting any work.
Why does my new drive belt still slip after replacement?
Slipping after a new installation usually means the belt tension is too low, so re-adjust the motor or tensioner to achieve the correct half-inch deflection.
What is the best belt type for a vibration-prone wood lathe?
A link belt is widely considered the best choice for reducing vibration because its segmented design naturally dampens motor and spindle imbalances.