How to Calibrate a Miter Saw for a Perfect 90
Achieving factory-perfect cuts starts with knowing how to calibrate a miter saw for a perfect 90. Studies show that even a 1-degree misalignment can cause visible gaps in trim work, costing homeowners and contractors hundreds in wasted materials. According to industry surveys, nearly 60% of DIYers struggle with inaccurate miter saw cuts due to improper calibration. The good news is that calibrating your saw takes less than 20 minutes and requires only basic tools. This guide walks you through every step with clarity so you can cut with total confidence.
Why Miter Saw Calibration Matters More Than You Think
Most woodworkers blame their materials when joints don’t fit. However, the real culprit is almost always a misaligned saw blade. Even brand-new miter saws can arrive slightly out of square from the factory. Regular use, transportation, and vibration all shift your saw’s settings over time. Proper calibration is the foundation of every clean, professional cut.
The Hidden Cost of Skipping Calibration
A misaligned blade wastes lumber, time, and money on every single project. For example, a 0.5-degree error multiplies across multiple cuts and ruins an entire baseboard installation. Trim carpenters report that skipped calibration accounts for most material waste on jobsites. Therefore, investing a few minutes before each major project always pays off.
Tools You Need Before You Start
Gathering your tools first makes the calibration process smooth and efficient. You do not need expensive equipment to get a factory-level square. Here is a simple list of what to have on hand:
- Reliable combination square or machinist square (6-inch or 12-inch)
- Digital angle gauge or protractor
- Flat scrap wood pieces (MDF or plywood work well)
- Pencil and notepad for recording measurements
- Allen wrench set and screwdrivers for adjustments
- Clamps to secure test pieces
Using a high-quality machinist square gives you the most accurate reference point. Avoid cheap plastic squares because they often carry their own measurement errors. A digital angle gauge is especially useful for fine-tuning bevel adjustments. Having all tools ready before starting saves multiple trips to your toolbox.
How to Calibrate a Miter Saw for a Perfect 90: Step-by-Step
Following a structured process ensures you address every possible misalignment. Work through each step in order for the best results. Rushing any stage will force you to repeat the entire process.
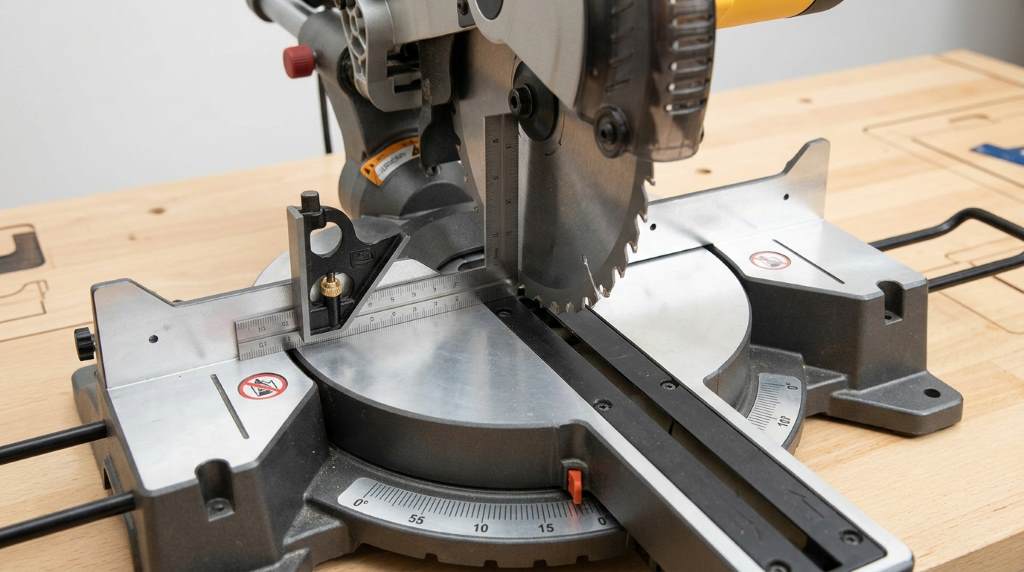
Step 1: Set Up Your Saw on a Flat, Stable Surface
Place your miter saw on a level workbench or dedicated stand before making any adjustments. An uneven surface introduces false readings that will mislead every measurement you take. Use a level to confirm the saw’s base sits completely flat. Tighten all mounting bolts if your saw attaches to a stand.
Step 2: Check the Blade for Wobble and Damage
Spin the blade slowly by hand with the saw unplugged and the guard carefully lifted. Look for any lateral wobble, bent teeth, or visible damage along the blade plate. A warped blade cannot deliver a true 90-degree cut regardless of how well you calibrate the saw. Replace damaged blades before proceeding with any adjustments.
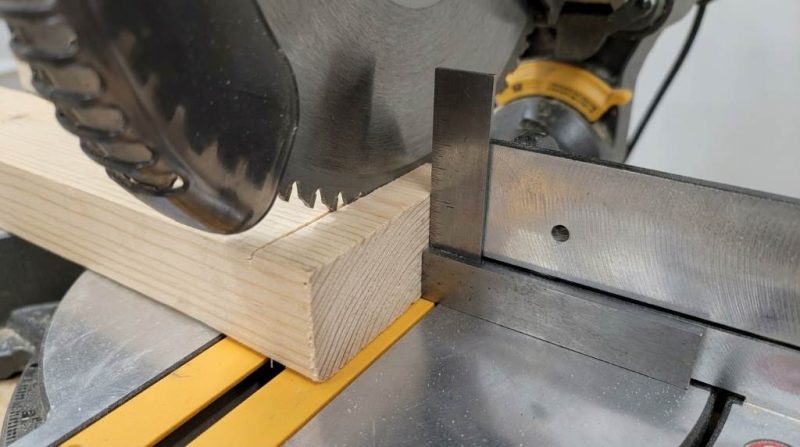
Step 3: Test the Vertical (Bevel) Angle
Set your bevel adjustment to the zero position and lock it firmly. Place your machinist square flat on the saw table and slide it against the blade body, avoiding the teeth. The blade face should align perfectly with the square’s vertical edge. If you notice any gap or lean, your bevel needs adjustment.
To adjust the bevel:
- Locate the bevel lock knob, usually at the back or side of the saw head
- Loosen the lock slightly
- Tilt the head until the blade sits flush against your square
- Tighten the lock and retest immediately
- Repeat until the gap disappears completely
Step 4: Check the Miter Angle
Reset the miter scale to the zero-degree position and lock the miter knob. Cut a piece of scrap wood cleanly through the center. Flip one piece and press the two cut faces together on a flat surface. If a gap appears anywhere along the joint, your miter angle is off by half of the total visible gap.
To adjust the miter angle:
- Loosen the miter lock handle
- Rotate the table left or right in small increments
- Use your digital angle gauge for precise readings
- Lock the table and retest with fresh scrap cuts
- Confirm the adjustment holds after three consecutive test cuts
Step 5: Verify the Fence Alignment
Your fence must sit perfectly perpendicular to the blade path for cuts to come out true. Press a long straightedge against the fence face and check for any bowing or gaps. A bent or damaged fence introduces errors that no amount of blade adjustment can fix. Many saws include fence adjustment screws that let you micro-correct the fence position.
Step 6: Run a Final Test Cut and Measure
Make a slow, controlled cut through a piece of 3/4-inch MDF after completing all adjustments. Measure the cut face immediately with your machinist square at three points: top, middle, and bottom. All three points must show zero gap against the square’s blade. If any point shows a gap, repeat the relevant adjustment step.
Common Calibration Mistakes and How to Avoid Them
Even experienced woodworkers make avoidable errors during calibration. Knowing these pitfalls saves time and frustration.
Trusting the Scale Markings Blindly
Miter saw scales are helpful reference points, but they are rarely perfect. Always verify the actual cut angle with a physical square or gauge. Scale detents can shift over time due to wear and repeated use. Therefore, rely on your measuring tools, not the printed numbers.
Measuring Against the Teeth Instead of the Blade Body
Placing your square against the carbide teeth gives a false reading every time. Teeth are angled outward from the blade body by design. Always place your square flat against the flat steel body of the blade. This single habit change dramatically improves your measurement accuracy.
Skipping the Recheck After Tightening
Many beginners adjust the saw head and immediately declare success without retesting. Tightening lock knobs often shifts the position slightly due to mechanical pressure. Always re-measure after every tightening action. Running two or three confirmatory test cuts is always worth the extra scrap wood.
Maintaining Your Calibration Over Time
Calibration is not a one-time event because saws drift with use. Build a quick five-minute pre-project check into your workflow every time you start a new job. Store your saw on a stable, vibration-free surface when it is not in use. Transport your saw in a padded case or with the head locked to prevent travel-induced misalignment.
Clean your saw’s pivot points and adjustment mechanisms regularly with a dry brush. Sawdust buildup in detent holes and pivot slots is a leading cause of calibration drift. Apply a light machine oil to pivot points every few months to keep movements smooth. Consistent maintenance keeps your saw cutting at 90 degrees longer between full recalibrations.
When to Call a Professional or Replace Your Saw
Most calibration issues are DIY-fixable with patience and the right tools. However, some problems signal deeper mechanical damage worth professional attention. A cracked fence, a bent arbor shaft, or a stripped bevel lock mechanism all require expert repair. If your saw cannot hold calibration for more than a few cuts, the internal detent system may be worn and need replacement parts.
Knowing how to calibrate a miter saw for a perfect 90 also means knowing when the saw itself is the problem. Entry-level saws sometimes develop persistent alignment issues after heavy use. Investing in a mid-range or professional-grade saw often eliminates chronic calibration headaches entirely. Quality saws hold their settings far longer and respond better to adjustment.
Conclusion
Learning how to calibrate a miter saw for a perfect 90 is one of the highest-value skills any woodworker or DIYer can develop. A properly calibrated saw eliminates wasted materials, reduces project time, and makes every joint fit beautifully. Following the step-by-step process in this guide, you can achieve professional-grade accuracy with the tools you already own. Make calibration a habit before every major project and you will notice an immediate improvement in your results.
Ready to put this into practice? Grab your machinist square, set aside 20 minutes, and run through each step today. Share this guide with a fellow woodworker who struggles with crooked cuts. Your next project deserves perfectly square cuts from the very first board.
Frequently Asked Questions
How often should I calibrate my miter saw?
Calibrate your miter saw before every major project and after any transport or accidental impact.
Can I calibrate a miter saw without a machinist square?
You can use a combination square, but a machinist square gives more reliable and accurate results.
Why does my miter saw keep going out of alignment?
Worn detent springs, loose lock knobs, and vibration during use are the most common causes of recurring misalignment.
What is the difference between bevel and miter calibration?
Bevel calibration adjusts the blade’s tilt left or right, while miter calibration adjusts the horizontal angle of the cut.
Does blade type affect calibration accuracy?
Yes, a warped or low-quality blade introduces errors that calibration alone cannot correct, so always start with a straight blade.