Live edge wood furniture has become one of the most sought-after trends in American home design. Studies show that the custom wood furniture market in the USA has grown by over 12% in recent years, with live edge pieces leading the demand. However, many buyers and DIYers overlook the most critical step: knowing how to seal live edge wood slabs correctly. Sealing protects the natural beauty of the wood, prevents cracking, and extends the life of your piece for decades. This guide gives you everything you need to do the job right.
Why Sealing Live Edge Slabs Is Non-Negotiable
Unsealed live edge slabs are highly vulnerable to moisture, dust, and daily wear. Wood is a living material that constantly expands and contracts with changes in humidity. Without a proper seal, your slab can warp, crack, or develop mold over time. Sealing locks in the wood’s natural oils and creates a barrier against the environment. It also enhances the grain, figure, and color of the slab dramatically.
Beyond aesthetics, sealing provides structural protection that increases the longevity of your investment. A poorly sealed or unsealed slab will begin to show surface damage within months of use. Whether your slab sits in a kitchen, dining room, or office, it faces daily exposure to spills, UV light, and temperature changes. Sealing is the single most important finishing step you can take. Skipping it or doing it wrong will cost you far more in repairs or replacements later.
Choosing the Right Sealer for Your Live Edge Slab
Not all sealers work equally well on live edge wood. The type of wood, your desired finish, and the intended use of the piece all influence your choice. Below are the most commonly used sealers for live edge projects in the USA.
Epoxy Resin
Epoxy is one of the most popular choices for live edge river tables and countertops. It fills voids, knots, and bark inclusions while creating a thick, glass-like protective layer. Two-part epoxy systems provide excellent resistance to heat, water, and chemicals. However, epoxy yellows over time when exposed to direct UV light, so use a UV-resistant formula when possible. Apply it in a temperature-controlled space to avoid bubbling or uneven curing.
Polyurethane (Oil-Based and Water-Based)
Oil-based polyurethane offers a warm, amber tone and excellent durability for dining tables and desks. Water-based polyurethane dries faster, stays clear, and produces fewer fumes, making it ideal for indoor projects. Both types build up in layers for a hard, protective surface. Most professionals recommend at least three coats for live edge slabs used as tabletops. Sand lightly between each coat with 220-grit sandpaper for the smoothest result.
Hardwax Oil
Hardwax oil is a penetrating finish that soaks into the wood rather than sitting on top of it. It provides a natural, matte look that many designers and woodworkers prefer for its organic appeal. This finish is easier to repair because you can spot-treat damaged areas without refinishing the entire slab. It does require more frequent reapplication compared to film-forming finishes. Hardwax oil works especially well on softer woods like walnut, ash, and cherry.
Danish Oil and Tung Oil
These penetrating oils bring out the natural grain and provide moderate protection for decorative or lightly used pieces. They are easy to apply and offer a soft sheen that complements rustic decor styles. However, they do not provide the same level of protection as epoxy or polyurethane for heavy-use surfaces. Use them for wall-mounted slabs, shelves, or decorative accent pieces. Reapplication every six to twelve months keeps the finish looking fresh and protective.
How to Seal Live Edge Wood Slabs Correctly: Step-by-Step Process
Following a proper process is just as important as choosing the right product. Knowing how to seal live edge wood slabs correctly means preparing the surface thoroughly before a single drop of sealer touches the wood. Here is the complete professional process used by experienced woodworkers across the USA.
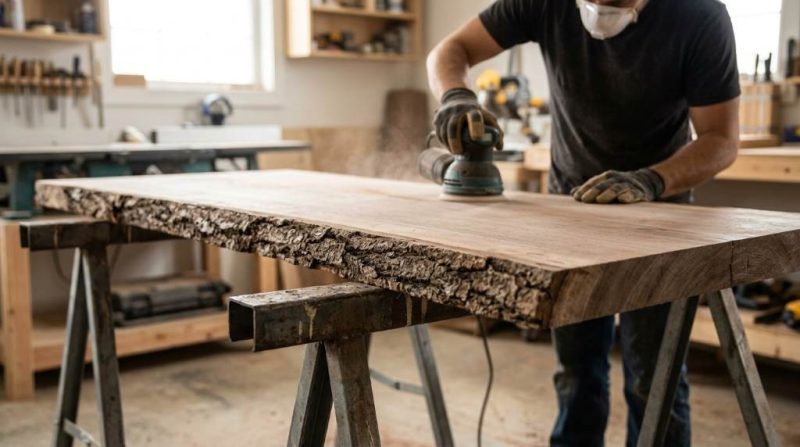
Step 1: Flatten and Sand the Slab
Start by ensuring your slab is flat using a router sled, wide belt sander, or hand planer. Any high spots or twist in the slab will be locked in permanently once sealed, so address them now. Begin sanding with 80-grit sandpaper to remove mill marks and surface roughness. Progress through 120, 150, and finally 180 or 220-grit for a smooth, uniform surface. Always sand in the direction of the grain to avoid cross-grain scratches that show under a clear finish.
Step 2: Clean and Degrease the Wood
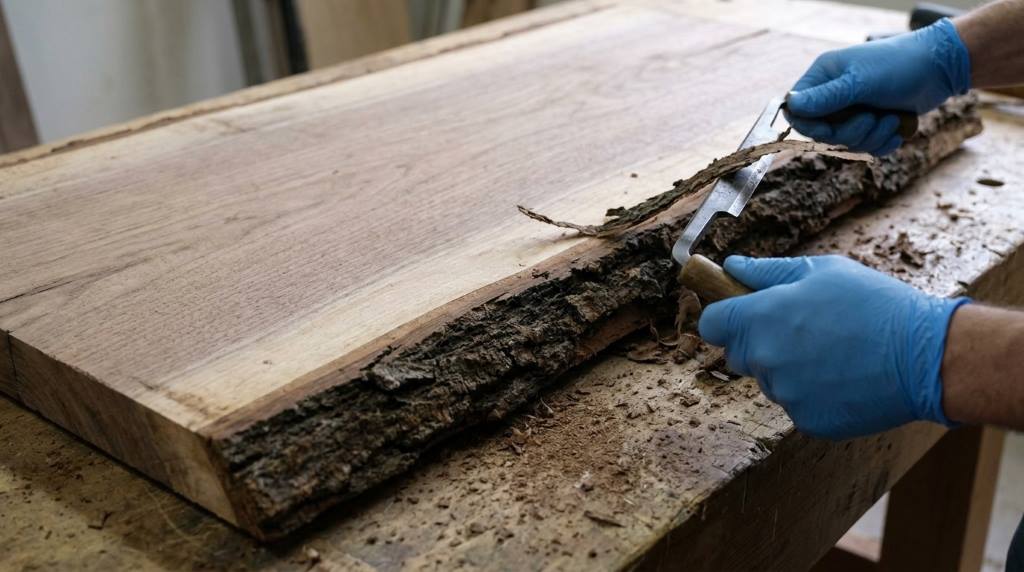
After sanding, remove all dust using a vacuum followed by a tack cloth or a clean rag dampened with mineral spirits. Pay special attention to the live edge itself, as bark, debris, and oils often collect in the natural curves and crevices. If you plan to remove bark, do it now using a chisel, wire brush, or sandpaper. Allow the wood to dry completely after cleaning, especially if you used any liquid during this stage. Any leftover dust or grease will prevent the sealer from bonding properly to the surface.
Step 3: Apply a Grain Filler or Sanding Sealer (Optional)
Open-grain woods like oak, ash, and walnut benefit from a grain filler before the topcoat. Grain filler creates a smoother base and reduces the number of finish coats needed. Apply it with a putty knife or rubber squeegee, working it into the grain at a 45-degree angle. Wipe off the excess after a few minutes and allow it to dry fully before sanding back to a smooth surface. This step is optional for tight-grain woods like maple, cherry, or hard maple.
Step 4: Seal the Bark and Live Edges First
Before coating the flat surface, focus on the live edge. The bark, if retained, needs a thin coat of clear sealer or wood glue to stabilize it. Use a foam brush or fine artist’s brush to work the sealer into every crack and crevice along the live edge. This prevents the bark from loosening, cracking, or flaking off over time. Allow this to cure fully before moving on to the main flat surface.
Step 5: Apply the First Coat of Your Chosen Sealer
For epoxy, mix the two parts precisely according to the manufacturer’s ratio and pour slowly to minimize bubbles. Use a heat gun or torch briefly over the surface to pop any air bubbles that rise to the surface. For polyurethane or hardwax oil, use a high-quality foam roller or natural-bristle brush in long, even strokes with the grain. Apply thin coats rather than thick ones to avoid drips, runs, and uneven buildup. The first coat acts as a sealing layer that the wood absorbs more heavily than subsequent coats.
Step 6: Sand Between Coats
Allow each coat to cure fully according to the product’s instructions before sanding. Use 220-grit sandpaper or a fine sanding sponge to lightly scuff the surface between each coat. This step removes dust nibs, levels any brush marks, and helps the next coat bond properly. Wipe away all sanding dust with a tack cloth before applying the next layer. Skipping this step is one of the most common mistakes that results in a cloudy or uneven final finish.
Step 7: Apply Additional Coats and Final Cure
Apply at least two to three finish coats after your initial sealing layer, more for high-traffic surfaces like dining tables or kitchen islands. The final coat determines the sheen level, so choose a matte, satin, or gloss finish based on your design preference. Allow the completed piece to cure fully before placing any objects on it. Full cure time for most polyurethanes is 24 to 72 hours, while epoxy may need up to seven days for complete hardness. Rushing this step leads to surface marks, dents, and finish failures that are difficult to repair.
Common Mistakes to Avoid When Sealing Live Edge Slabs
Even experienced woodworkers make preventable errors during the sealing process. Avoiding these mistakes saves time, materials, and frustration.
- Skipping surface preparation: Sanding and cleaning are not optional. Any shortcut here will show in the final finish.
- Applying too-thick coats: Thin, even coats build a stronger, clearer finish than thick single applications.
- Sealing wet or damp wood: Always check the moisture content of your slab with a wood moisture meter before sealing. Ideal moisture content is between 6% and 9% for most indoor applications.
- Not sealing the underside: Sealing only the top allows moisture to enter from below, causing warping and cupping over time. Always seal all surfaces of the slab.
- Using incompatible products: Never apply oil-based products over water-based ones or vice versa without checking compatibility first.
How to Maintain a Sealed Live Edge Slab
Proper care after sealing extends the life of your finish significantly. Clean the surface regularly with a slightly damp cloth and avoid harsh chemical cleaners that can break down the finish. Use coasters and trivets under hot or wet items, especially on polyurethane-finished tabletops. Reapply hardwax oil annually or as needed when the surface begins to look dry or dull. Inspect the live edges and any void fills seasonally to catch any early signs of lifting or cracking.
For epoxy-finished slabs, use a UV-protective polish once or twice a year to slow yellowing. For oil-finished surfaces, a light buffing with a clean cloth after each oiling session brings out a beautiful natural sheen. Avoid placing slabs in direct sunlight without UV protection, as prolonged exposure fades the wood and breaks down most clear finishes. Simple, consistent maintenance keeps your sealed slab looking professionally finished for many years. Understanding how to seal live edge wood slabs correctly also means knowing how to care for them long after the finish has been applied.
Protect Your Investment with the Right Seal
Knowing how to seal live edge wood slabs correctly transforms a raw, beautiful piece of nature into a durable, lasting work of functional art. From choosing the right sealer to following each preparation and application step with care, every detail matters. Take the time to prepare properly, apply thin even coats, and allow full cure time before use. A well-sealed slab will hold up beautifully for decades and only grow more beautiful with age. Start your project today and give your live edge slab the protection it deserves.
Frequently Asked Questions
How many coats of sealer does a live edge slab need?
Most live edge slabs need a minimum of three coats of finish for adequate protection on tabletop surfaces.
Can I use regular varnish to seal a live edge slab?
Yes, but polyurethane or epoxy are better choices as they offer stronger protection and better durability for live edge pieces.
Do I need to seal the bottom of a live edge slab?
Yes, sealing all surfaces including the bottom prevents moisture from entering the wood unevenly and causing the slab to warp or cup.
How long should I wait before using a sealed live edge table?
Wait at least 72 hours for polyurethane finishes and up to seven days for epoxy to reach full hardness before placing items on the surface.
What is the best sealer for a live edge dining table?
Oil-based polyurethane or two-part epoxy are the most durable and commonly recommended sealers for live edge dining tables in the USA.